
Authentication with Firebase
The aim of this article is to cover how to set up authentication using Firebase, what authentication is, and why it's important.


Prerequisites
Authentication with Firebase
This article assumes you have some knowledge of authentication and can use Javascript.
What is authentication?
Authentication is the process of verifying someone's or something's identity. Authentication usually takes place by checking a password, a hardware token, or some other piece of information that proves identity. - Cloudflare
In simple web-related terms, it's the means of identifying if a user is who they claim to be.
Why Authentication is important
Authentication helps keep a product safe by only permitting the authenticated user to gain access to its protected resources. Thereby keeping any malicious user from using or damaging the product.
Why Firebase?
Building a user-friending authentication system is a herculean task; it takes a lot to get a secure authentication system running. A detailed article was written on this here. It's more advisable to use "software as a service" (SaaS) like Firebase, which makes everything easy to set up, highly scalable and secure
Firebase Authentication aims to make building secure authentication systems easy. While improving the sign-in and onboarding experience for end users. - Google
Firebase streamlines your authentication process, and it takes far less time to set up.
Sign-in methods
Firebase provides a lot of different sign-in methods, including email address and password sign-in, and Authentication providers such as Google Sign-in and Facebook Login.
This article will focus on how to use the email sign-in and Google Sign-in methods; the rest of the methods follow the same principle, You can check out how it works in the documentation
Setting up Firebase
To use Firebase Authentication, you'll need to register your app on Firebase first. Here are the steps:
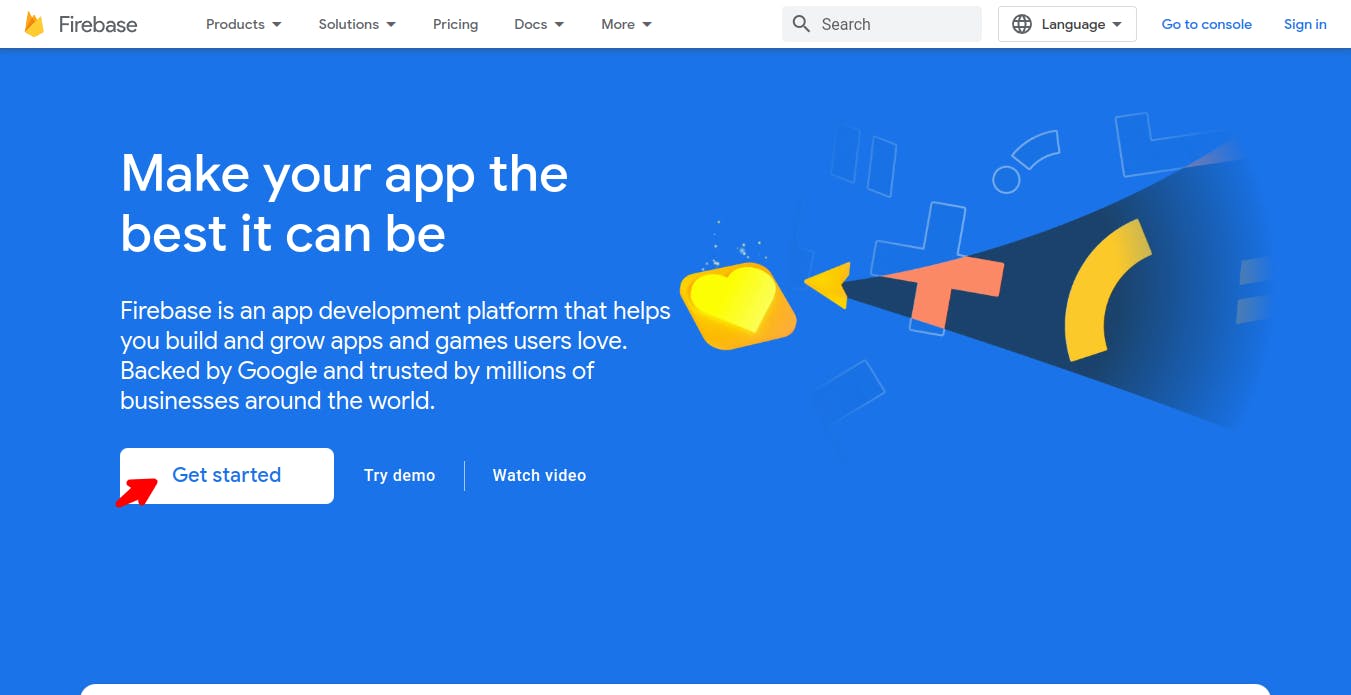
- Head over to https://firebase.google.com/ click on get started and sign in
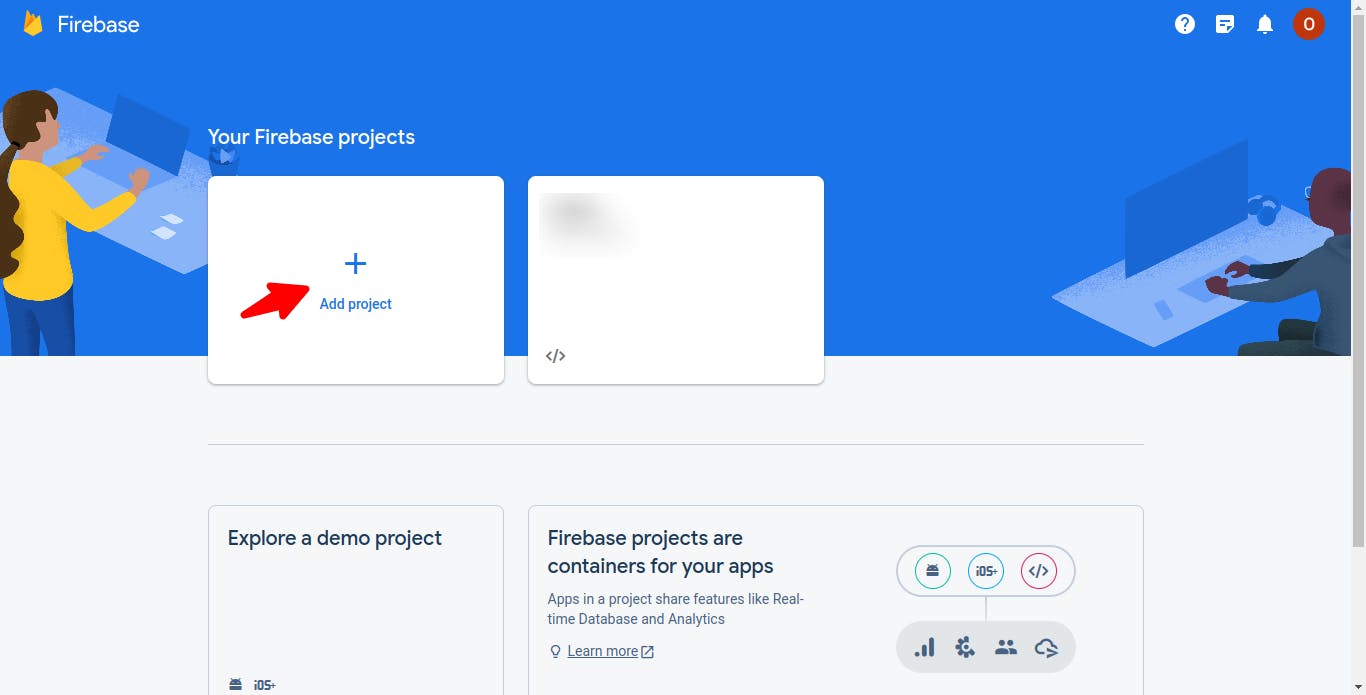
- Follow the instructions that pop up, and you'll be redirected to the Firebase console. Click on Add Project.
- Select a name for your app and click next

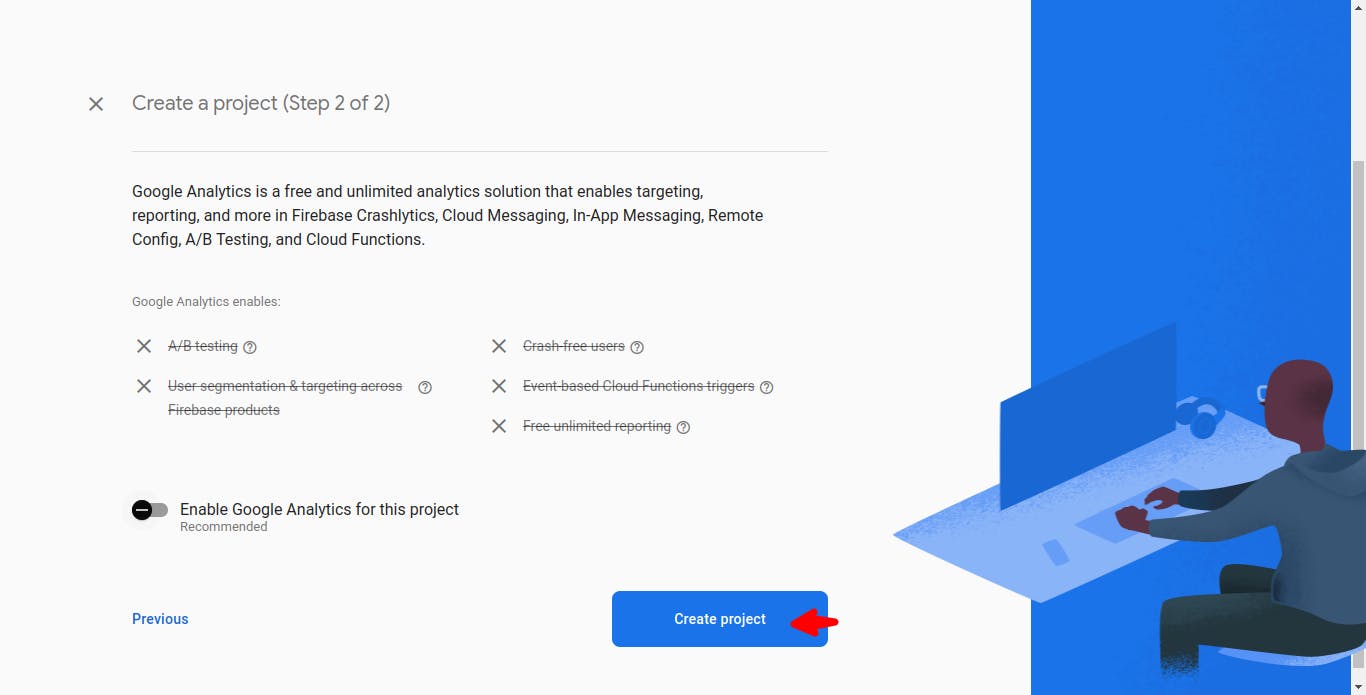
- Choose if you want analytics or not, then wait for your app to get set up
- After completing your app, you can begin utilizing Firebase's features. Simply select the appropriate project type (web, Android, or iOS) to initialize Firebase.

- This will bring up a pop-up where you can input your preferred name for the project, and the code required to finish setting up Firebase is provided. Save the code in a configuration
config.jsfile; it'll be needed later. and install Firebase with node.js usingnpm install firebase

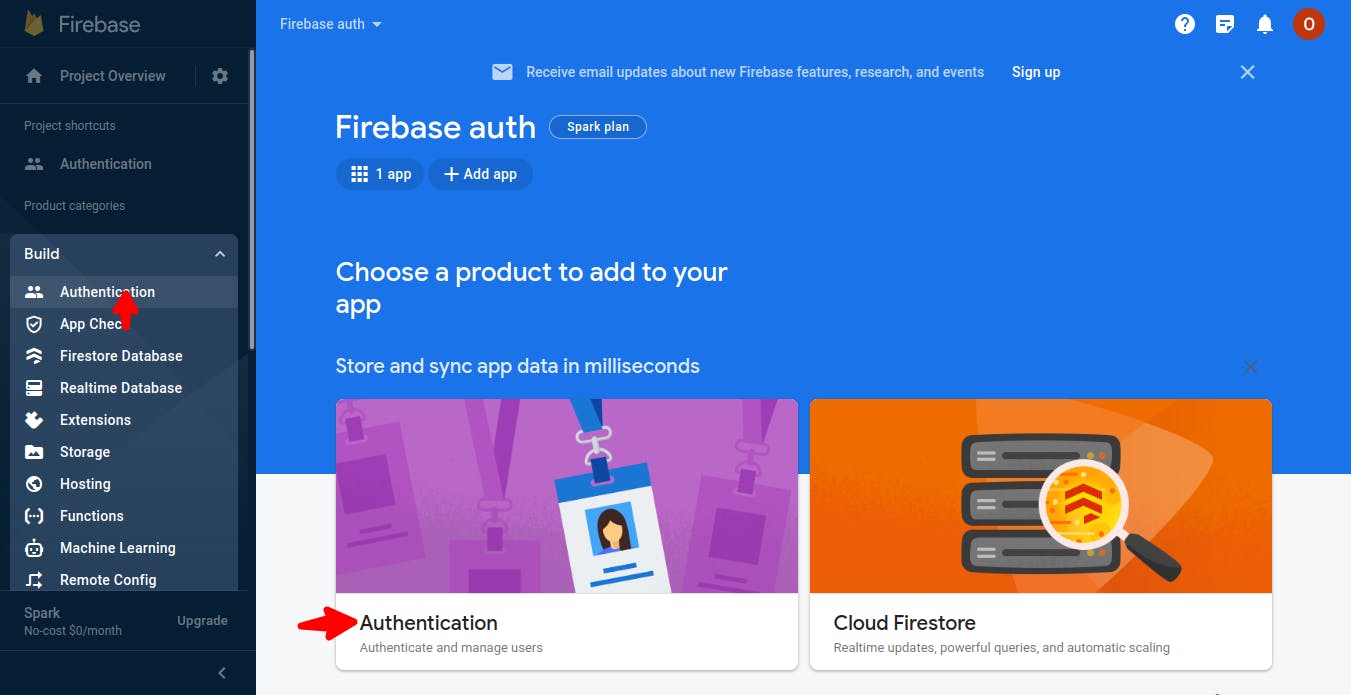
- Click on Authentication on the sidebar or from other places on the page
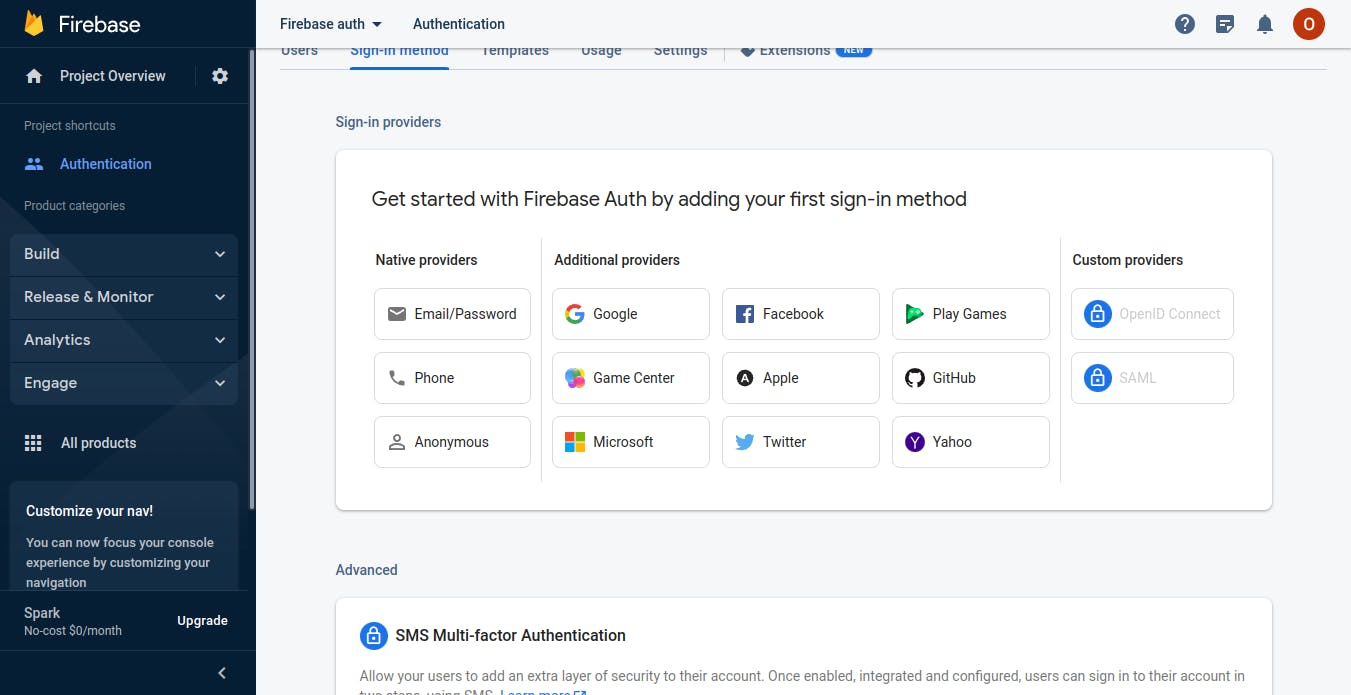
- On the new page, click on Sign-in Methods. This leads to where you'll choose your preferred authentication provider

- Choose one of the providers available for this article; I'll be going with email and Google
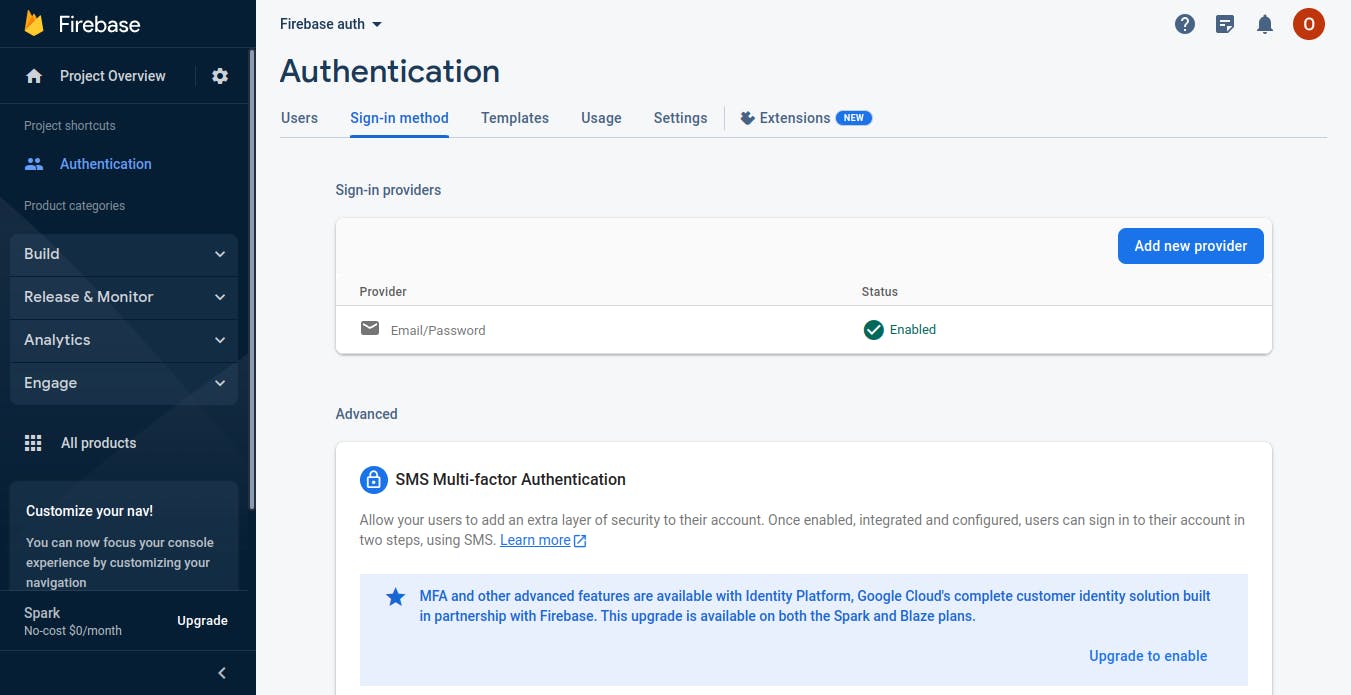
- You're done setting up Authentication on Firebase. All that remains is adding it to your code base.
Using Firebase Authentication
With everything set up, it's time to code :)
Config file
Earlier, I requested that you save the configuration file. The code provided by Firebase is in this file.
It contains all the necessary information that Firebase requires to get started
Such as apiKey and the rest. There's usually no need to edit the boilerplate code given to you.
You should make sure to secure your sensitive information, like apiKey, by using a
.envfile
// Import the functions you need from the SDKs you need
import { initializeApp } from "firebase/app";
// TODO: Add SDKs for Firebase products that you want to use
// https://firebase.google.com/docs/web/setup#available-libraries

// Your web app's Firebase configuration
const firebaseConfig = {
  apiKey: "deleted",
  authDomain: "deleted",
  projectId: "deleted",
  storageBucket: "deleted",
  messagingSenderId: "deleted",
  appId: "deleted",
};

// Initialize Firebase
const app = initializeApp(firebaseConfig);

// Initialize Firebase Authentication and get a reference to the service
const auth = getAuth(app);
Importing all the functions required
Firebase provides functions for everything we may need while setting up authentication, from signing in to logging out for every authentication provider
To use these functions, you'll have to import them at the top of your authentication file
import { app } from "./config";
import {
  getAuth, // // Initialize Firebase Authentication
  signInWithRedirect, // Sign in function for the google method using redirect
  signInWithPopup, // Sign in function for the google method using pop up
  GoogleAuthProvider, // Google provider object
  getRedirectResult, // Getting result from signInWithRedirect
  signInWithEmailAndPassword, // Sign in function for the email method
  createUserWithEmailAndPassword, // Sign up new user for email method
  signOut, // General signOut function for all Auth. methods
} from "firebase/auth";

const auth = getAuth();

const provider = new GoogleAuthProvider();
Using the email and password Authentication method
As the name implies, this method requires an email and password to work. It takes the email and password provided to create a user in the database, which can then be used for authentication
Sign up a new user
To create a new user, a function provided by Firebase called createUserWithEmailAndPassword is needed. It receives three parameters
auth: defined above
email
password
Create a registration form for new users with an email and password. Verify both and send them to the createUserWithEmailAndPassword method.
createUserWithEmailAndPassword(auth, email, password)
  .then((userCredential) => {
    // Signed in
    const user = userCredential.user;
    // ...
  })
  .catch((error) => {
    const errorCode = error.code;
    const errorMessage = error.message;
    // ..
  });
Sign in an existing user
To sign in an existing user, Firebase provides a function called signInWithEmailAndPassword
Create a form that allows existing users to sign in using their email address and password. When a user completes the form, call the signInWithEmailAndPassword method:
signInWithEmailAndPassword(auth, email, password)
  .then((userCredential) => {
    // Signed in
    const user = userCredential.user;
    // ...
  })
  .catch((error) => {
    const errorCode = error.code;
    const errorMessage = error.message;
  });
Using the Google Authentication Provider method
Google is one of the federated identity providers (Others are Github, Facebook, etc.), and accounts created on such platforms can be used for authentication in other applications. For example, the Google provider uses the user's Gmail account for authentication
Sign in a user
To use any federated identity provider authentication method, the user must have an account on the platform so there's no need to create an account; all that's needed is to sign in
For signing a user in with Google, Firebase provides two functions:
signInWithPopup: This prompts your users to sign in with their Google Accounts by opening a pop-up windowsignInWithRedirect: This prompts your users to sign in with their Google Accounts by redirecting them to the sign-in page
signInWithRedirectis recommended for mobile devices
To sign in with pop-up, call the signInWithPopup with auth and provider parameters, both defined earlier at the top of the authentication file
signInWithPopup(auth, provider)
  .then((result) => {
    // This gives you a Google Access Token. You can use it to access the Google API.
    const credential = GoogleAuthProvider.credentialFromResult(result);
    const token = credential.accessToken;
    // The signed-in user info.
    const user = result.user;
  }).catch((error) => {
    // Handle Errors here.
    const errorCode = error.code;
    const errorMessage = error.message;
    // The email of the user's account used.
    const email = error.customData.email;
    // The AuthCredential type that was used.
    const credential = GoogleAuthProvider.credentialFromError(error);
  });
To sign in with redirect, call the signInWithRedirect with auth and provider parameters, both defined earlier at the top of the authentication file.
signInWithRedirect(auth, provider);
then call getRedirectResult with just the auth parameter to retrieve the data after the redirect
getRedirectResult(auth)
  .then((result) => {
    // This gives you a Google Access Token. You can use it to access Google APIs.
    const credential = GoogleAuthProvider.credentialFromResult(result);
    const token = credential.accessToken;
    // The signed-in user info.
    const user = result.user;
  }).catch((error) => {
    // Handle Errors here.
    const errorCode = error.code;
    const errorMessage = error.message;
    // The email of the user's account used.
    const email = error.customData.email;
    // The AuthCredential type that was used.
    const credential = GoogleAuthProvider.credentialFromError(error);
    // ...
  });
Signing out a User
Firebase provides a function that signs out a user regardless of the Authentication provider used, called signOut
The signOut function only takes one parameter, which is auth, which is defined at the beginning
// Signing Users out
signOut(auth)
  .then(() => {
    // Sign-out successful.
  })
  .catch((error) => {
    // An error happened.
  });
And that's all you need to create secure and smooth Authentication.
See how simple it was? That's the aim of Firebase authentication. There's far more to Firebase than this. If you're interested, please look into the Firebase documentation.
Thanks for reading